Setting Up a G Wifi Network for PS4: A Step-by-Step Guide
Connecting your PlayStation 4 (PS4) to a wireless network is a crucial step to access online gaming, streaming, and updates. However, setting up a G wifi network for PS4 can be a bit challenging, especially if you're not tech-savvy. In this article, we'll guide you through the process of setting up a G wifi network for your PS4, including the steps to follow, common issues to troubleshoot, and tips to ensure a stable and fast connection.Step 1: Gather Your Information
Before setting up your G wifi network for your PS4, ensure you have the following information: * Your router's username and password * Your network name (SSID) * The type of security protocol your router uses (e.g., WPA/WPA2) You can find this information in the paperwork provided by your ISP or on the manufacturer's website.Step 2: Connect to Your Wi-Fi Network
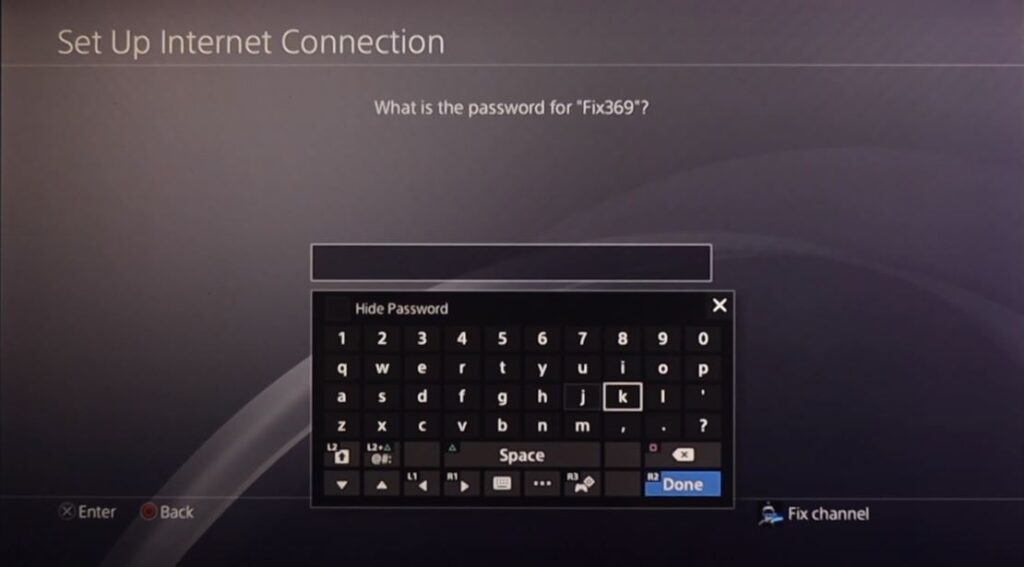
To connect to your Wi-Fi network, follow these steps: * Turn on your PS4 and navigate to the main menu * Scroll up to the top menu and select the Settings option * Select Network, then Set Up Internet Connection * Choose Wi-Fi as your connection method * Select the network you want to connect to from the list of available networks * Enter your network password (if required)Troubleshooting Common Issues
If you're experiencing issues connecting to your Wi-Fi network, check the following: * Ensure your router is turned on and broadcasting a signal * Check that your network is not hidden and that you have entered the correct SSID * Move your PS4 closer to your router or use a Wi-Fi extender to improve signal strengthStep 3: Configure Your Network Settings